Knowledgebase

01. How to access my cloud vps?

Accessing Your New Cloud VPS from The Client Area:

Step 1: Log into your Client Area:

  1. Click on the "Login" or "Client Area" option.
  2. Enter your email and password to log in.

Step 2: Locate Your Cloud VPS:

  1. Once logged in, navigate to the dashboard or the section related to your services.
  2. Look for your Cloud VPS instance in the list of services or products associated with your account.
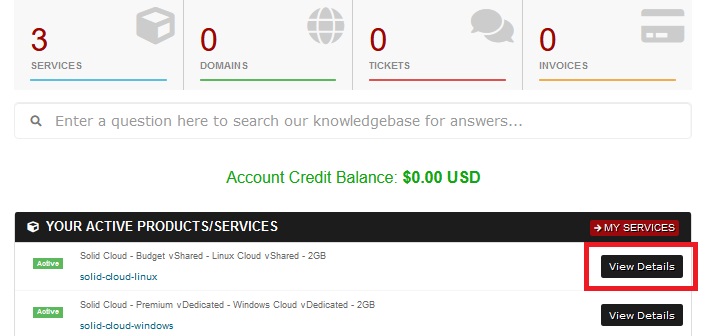
CloudVPS-ClientArea


Step 3: Access VPS Management Panel:

  1. Click on your Cloud VPS service to access the management panel.
  2. Allow your new server provision to complete, for Linux normally its instant, for Windows OS this can take 3-5 minutes to complete
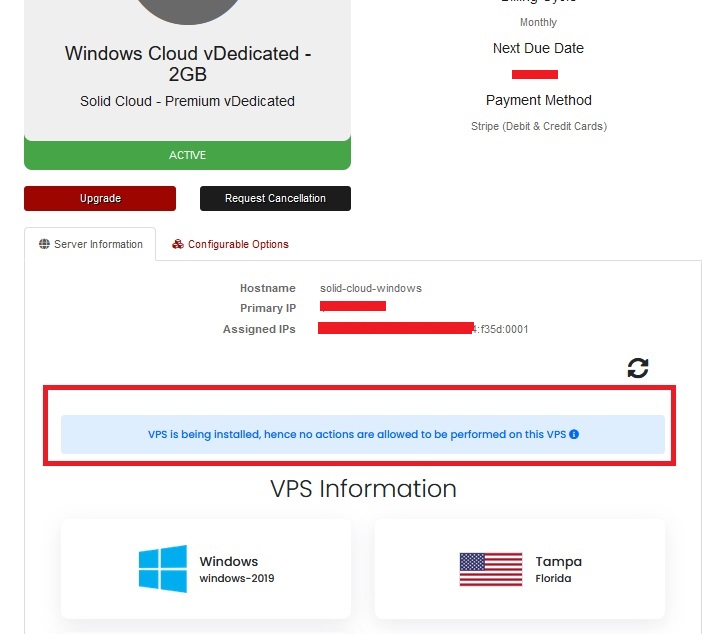
 

CloudVPS-Provision


Step 4: Cloud VPS is Ready:

  1. Once the provision is completed, you shall see the power option, VNC console as well as other options and features such as OS reload, hostname change, password change and more

Linux Panel Example:
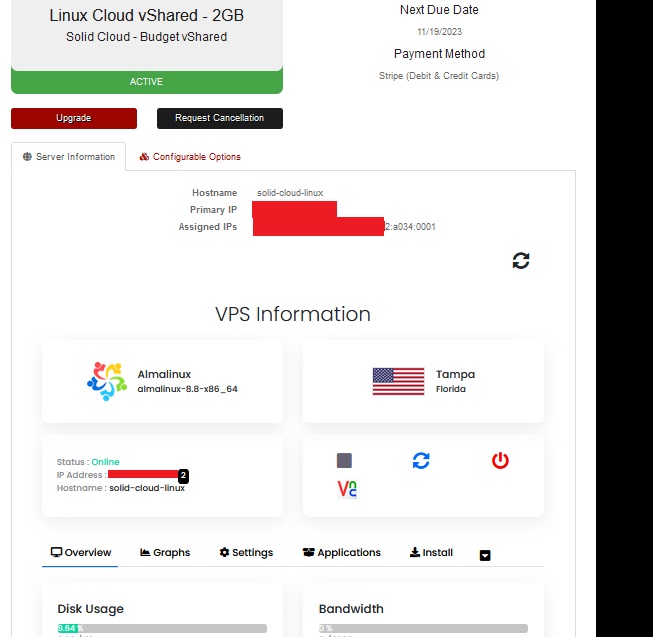
CloudVPS-LinuxPanel


Windows Panel Example:

CloudVPS-WindowsPanel

  • 55 Users Found This Useful

Was this answer helpful?

Related Articles

02- How to launch my cloud vps's VNC console?

Accessing Your New Cloud VPS from The Client Area: Step 1: Log into your Client Area: Click...

03- How to change cloud vps hostname?

Accessing Your New Cloud VPS from The Client Area: Step 1: Log into your Client Area: Click...

04- How to change cloud vps password?

Accessing Your New Cloud VPS from Client Area: Step 1: Log into your Client Area: Click on...

05- How to reload OS on the cloud vps?

Accessing Your New Cloud VPS from The Client Area: Step 1: Log into your Client Area: Click...

06- How to upgrade/downgrade the cloud vps?

Accessing Your New Cloud VPS from the Client Area: Step 1: Log into your Client Area: Click...